Leaving foot prints in the dewy grass, as i crossed the lawn to the workshop. Lifting up the cream coloured roller door as the radio chimes in 9 am. I think about what I plan to do this weekend. I feel like its taken ages to prepare my motorcycle, but I have to remember I’m only working on it two days out of seven.
The only items left on my list are just small things for me to do. That doesn’t count the items I am getting my Dad to help me with. Plugging the radio in, I get down to business, hoping this is the weekend I have it all back together and on the road once again.
Last weekend, I had to leave my bike almost complete. My friends busted me, staring at the bike, wondering where the rear indicators are meant to bolt into the frame. I’ve had a week to think about it, reaching into my box of bolts and other miscellaneous pieces. I found slightly longer bolts and used them to attach the brackets to the rear frame. I then feed the electrical cables over the frame and through to the CPU.
Earlier in the project, I had made an aluminium mudguard. This is to screw on to the end of the plastic one and extended it past the rear wheel by the required amount to obtain a safety certificate. Moving the rear stop / plate light down onto it, caused the electrical leads to stretched taut under the guard. I moved it back into the original position, as I do not think I will keep the aluminium mudguard on after I obtain the safety certificate.
I felt as if it was about time for a mini test run down the street. Deciding that I didn’t need the seat, I just connect the petrol tank to the carburettor. Turning the engine over, I head for our quiet little suburban street. Just as I got to the end of the driveway, less than fifty meters from the workshop, the bike stalls. Starting it back up, was easy after I pulled out the throttle and I hit the asphalt.
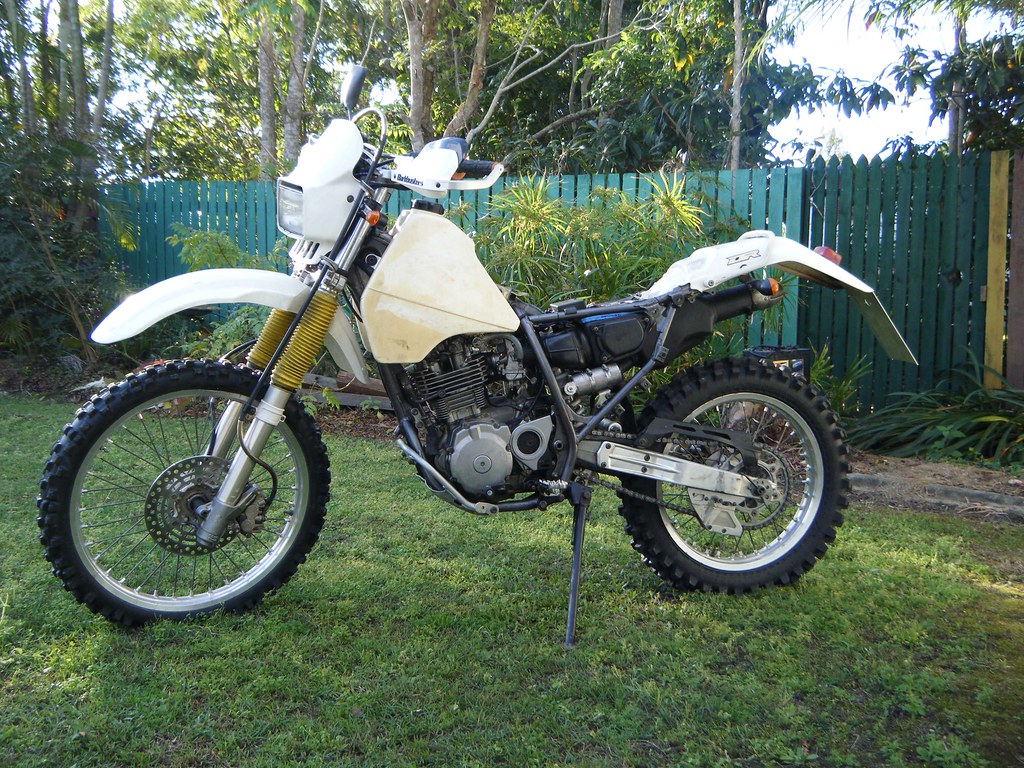 |
| DR 350 is almost complete. I rode it down the street as is. It makes it easier for me to touch the ground! |
The purpose of this test is to ensure that the bike runs well and had not faults with in the engine. I decide not to wear a helmet, so I can listen to its heartbeat a lot clearer. I tap the front breaks and rear breaks and discover, that they are completely useless. I might as well put my foot out to stop the bike, which is when the bike stalls again.
Starting it up again, I try to rack my brains as to why it’s stalling all the time. Generally, when a bike will not go, it has something to do with a couple of simple points, petrol, spark, and air. If you remember these things, it will make your life a lot easier when trying to diagnose a problem. For this particular problem, my first clue was the fact I have to pull the choke out. The second clue was that it was a nice even distance between stalling. Therefore, on my way back to the garage, I had some idea it had to do with petrol flow.
Arriving back at the front of the workshop, I left the bike idling as I tested the horn and then turned it off using the kill switch. They both worked perfectly. At least something works right.
Early Sunday morning, I get down to the business of changing my break fluid on the front and rear breaks. You have to remember, that break fluid is highly toxic stuff and will eat through paint and plastic. It’s highly recommendable that you use a couple of old rags to protect the areas on your motorcycle. I clean the reservoir of dirt and surround it with a rag. I also do the same on the break calliper. Pumping the fluid through the hose, I remove the worn yellow coloured fluid and replace it with bright green fluid.
 |
| My makeshift break fluid bleader. |
When it came time to do the front wheel, I attached the hose to the nipple and released the nut. When I squeezed the leaver, I found the fluid didn’t flow through the hose but came out sideways from the nut. Instantly tightening the nut, I took a closer look at the nipple. It was packed full of mud, reaching for a narrow nail it broke the dried mud up into tiny clumps and replaced the hose.
On the second time around, it worked, as it should have done. Topping up the top reservoir as the yellow fluid flowed out with the clumps of mud into the tin can. Placing the main container down on my makeshift workbench, I hear a strange noise and look over to it seeing, bottle on its side and green break fluid pouring all over the concrete floor. I must have placed the bottle down on the crack between the two boards causing it to tip over. Now I had to go into massive clean up mode before it eats a layer of concrete off the floor!
With nothing else to do, I decided to take my bike for another test run, placing the tank back on the bike, and turning on the petrol, it took a few seconds to flow down the pipe, filling up the carburettor and then spill out onto the bike. Immediately shutting off the fuel, I knew that this might have something to do with yesterday’s fuel problem. Removing the carburettor from the bike, I unscrew the screws and look at the floats. Measuring the distance between the base of the carburettor and the floats, I discover that it’s just boarder line past its limits.
Removing the floats, I bend the metal tab downwards and reinstall the floats. Putting the whole unit back together, I could then check to see if it is still flooding by hooking it up to the tank. No petrol spilled out, so I had done the trick. Time to install it back on the bike.
Removing the floats, I bend the metal tab downwards and reinstall the floats. Putting the whole unit back together, I could then check to see if it is still flooding by hooking it up to the tank. No petrol spilled out, so I had done the trick. Time to install it back on the bike.
Putting the whole bike back together, I take it for the final test run of the weekend. A group of tiny girls, run to their front fence and watch me race past, clapping and screaming with excitement. I wasn’t a good role model as I still had no helmet! Taping the breaks, I find my front ones now work but my rear are still soggy.
 |
| This is the first time Ive seen it all together in months! (Im putting on a larger tank - its not shown due to me, trying to keep it clean!) |
Back in the workshop, I look at my front rim. It’s slightly bent, but I had planed on swapping it with my other DR rim. Balancing the bike on the timber box, I remove the front wheel from both bikes. Lining up the new rim, I slide the axel through, but it hits a piece of metal, and does not slide further. Pushing a little bit harder, I start rocking the bike on top of the wooden box. Realizing how dangerous this whole exercise is, I remove the wheel from between the forks. On a closer inspection, the older DR has a smaller axel diameter.
Replacing the older rim back on its bike, I remove the bike from the gantry. I put the new bikes wheel back on, wheel it over to the gantry, and host it up. I now can remove the front wheel without been frighten of the whole thing tipping over and it can safely hang there until next weekend. As I am now going to have too send it off to see a professional doctor.
No comments:
Post a Comment