Showing posts with label 00_Pre Trip. Show all posts

September 29, 2010

Only a few days left!

With a less than a week to departure date, I am not feeling nervous at all, but really excited. So excited I can hardly wipe the smile off my face. But there is no time for that, I have a hundreds of tiny bits and pieces to cross of my list before I really can head off and enjoy my freedom. There are a few important items, I have to make sure I finished off this weekend, to ensure I was going to be able to leave on time.

On my last trip, I was quite proud to say, I carried fifteen kilograms on the back of my motorcycle at my heaviest during Russia and Mongolia. I predicted for this trip, my gear was going to exceed this due to adding a few luxury items, such as a computer and sketch pad. Wanting to get the misery out the way, I dumped all my gear into my bags in a haphazard way. Resting the bags on our general house hold scales, I got the biggest surprise. Both bags weighted between four and five kilograms! Adding my tent to the equation I have 11.8 kilograms.


Pulling everything out and spreading it all over my bedroom floor, I cut down any extra packaging. Re-taped taped things up and then grouped my toiletries, cooking equipment and motorcycle spare parts together into small packages. Stacking the tiny packages into my panniers, I fitted things in around each other like the computer game ‘Tetraus’. Knowing that these tidy well organised packages will make my life a lot easier in the future when hunting for something at a later date.

September 1, 2010

Building the Important Bits


As I said in an earlier blog, I have a secret weapon – My Dad. I picked him up late Thursday night and we drove out to the workshop together. I had great plans for him, I needed help with my pannier frame, oil cooler and tool boxes.

After a good night sleep, I poured out all my thoughts, ideas and worries. I took him on a guided tour of all my previous designs and pointed out their flaws. Lastly I showed him what Len and I had constructed for my pannier frame, explaining that it had been made from Dads old fold out chairs from his camping trip. The problem with this frame wasn’t the material we had chosen. It was because it was just too large for the pannier bags.

Jumping in the car, we headed to the local dump shop, to look for more suitable steel to re-do the pannier frames with. Dad spied out half a dozen long galvanized tent pegs. He puts on up to his knee and gently bent it to ‘test’ the strength. We come to the conclusion that they would be perfect, leaving them there we walk away to just check that it was the best that was available. As we turned away a man dressed in florescent overalls pushing and over flowing shopping car, picked up the tent poles and stuffed them into his trolley. Disappointed Dad was driven to ask him, if he needed all of them. Yes he replied mumbling about building some sort of shelter.

We wondered around, slightly bitter and angry for letting such a find go until I spot an exercise machine which had a perfect loop as its handle bar, all we needed was another one. Looking off to one side, we see six all lined up against a water tank. One of the guys working at the centre walks past and says he would take $8 for it. Slightly surprised by the high cost, and I was going to have to buy two, we walk on. Until we come across a hammock. Seeing the steel spreader, we took it and an old beach chair and walked to the counter with our treasure.

I place the steel on the counter, preparing to haggle. I ask, how much for these bits ‘n’ pieces? The man behind the register replies, ‘That would be three dollars’. Pulling out my wallet, I quickly pay before he changes his mind. We walked away pretty pleased with ourselves and stashed our treasure into the boot of the car.

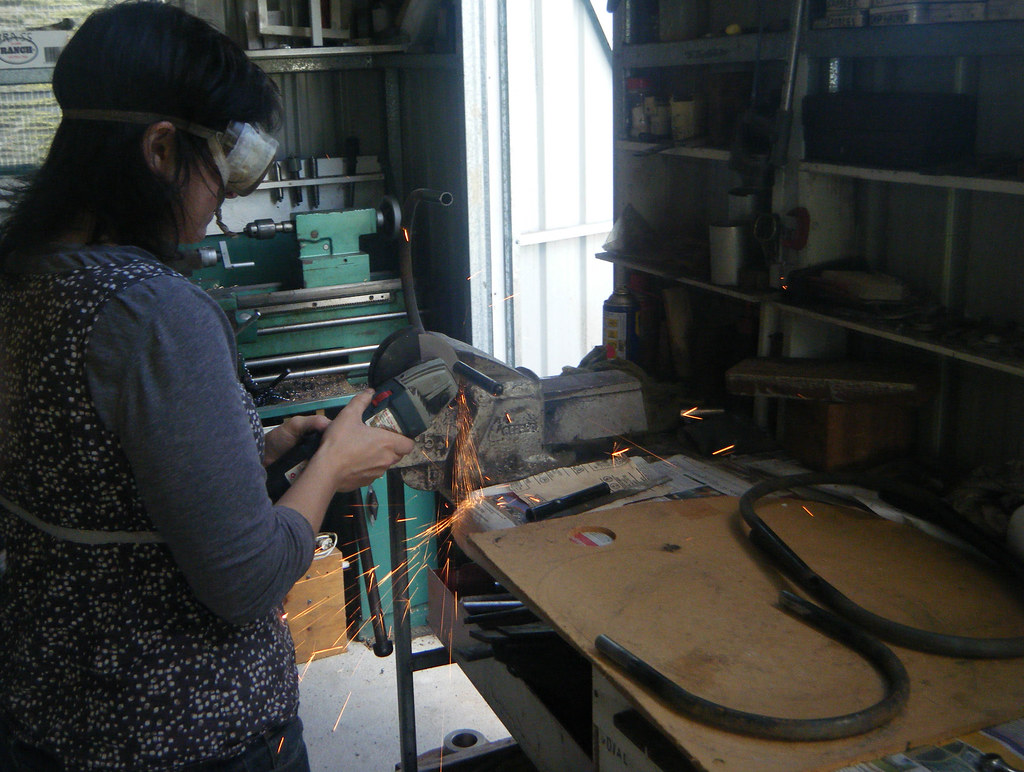
Back in the workshop, we discover that I was low on gas in my torch. Instead, I reach for my petrol cooker. We take turns at heating up the steel in sections and bending it once it was hot enough. Following our template we complete the bend. Unlike my test bend we manage to make the complete circle out of one length of steel. This means there is only one weld joint on the complete oval.


I would like to carry up to two liters of oil and half a liter of petrol (for my cooker) outside my pannier bags. I just want to try and get some of the weight out of the bags and let the bike support them separately. Therefore we need to devise a system to contain /hold the bottles. After much discussion and a show and tell of all my previous attempts, we decided the best option is to put the oil into an aluminum bottle. Then lock and store them in these 90mm storm water pipes.


Mounting the oval frame to the bike was another issue. Luckily for us, there were many places to mount the frame too, but working out which one was better took a bit of thinking. I wanted to retain the plastic covers as much as possible, not only for good looks but to stop mud spraying up at me and my pannier bags. The only other issue was been able to clean out the air filter on a regular basis. All these factors need careful consideration on where the mounts should be located.


With everything in place, and working I now have to work out how I am going to lock the aluminum bottles into place.


We decided if a rod slide through the tops of the aluminum bottles and locked onto the pannier frame. I have to do some home work before Dad gets back from his holiday. Before we finish off for the week, Dad primes the frame with a spray can I found in the shed. Now it’s ready to lock the storm water pipes into position and paint!


August 5, 2010

Putting it all Together.

Leaving foot prints in the dewy grass, as i crossed the lawn to the workshop. Lifting up the cream coloured roller door as the radio chimes in 9 am. I think about what I plan to do this weekend. I feel like its taken ages to prepare my motorcycle, but I have to remember I’m only working on it two days out of seven.

The only items left on my list are just small things for me to do. That doesn’t count the items I am getting my Dad to help me with. Plugging the radio in, I get down to business, hoping this is the weekend I have it all back together and on the road once again.

Last weekend, I had to leave my bike almost complete. My friends busted me, staring at the bike, wondering where the rear indicators are meant to bolt into the frame. I’ve had a week to think about it, reaching into my box of bolts and other miscellaneous pieces. I found slightly longer bolts and used them to attach the brackets to the rear frame. I then feed the electrical cables over the frame and through to the CPU.

Earlier in the project, I had made an aluminium mudguard. This is to screw on to the end of the plastic one and extended it past the rear wheel by the required amount to obtain a safety certificate. Moving the rear stop / plate light down onto it, caused the electrical leads to stretched taut under the guard. I moved it back into the original position, as I do not think I will keep the aluminium mudguard on after I obtain the safety certificate.

I felt as if it was about time for a mini test run down the street. Deciding that I didn’t need the seat, I just connect the petrol tank to the carburettor. Turning the engine over, I head for our quiet little suburban street. Just as I got to the end of the driveway, less than fifty meters from the workshop, the bike stalls. Starting it back up, was easy after I pulled out the throttle and I hit the asphalt.


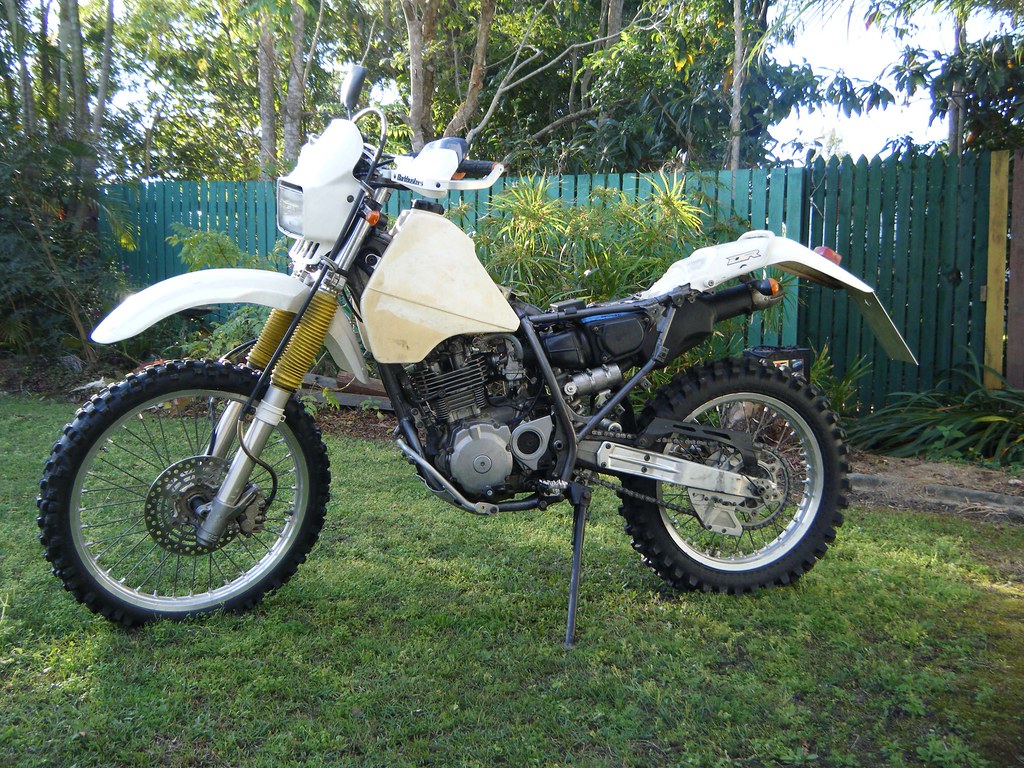
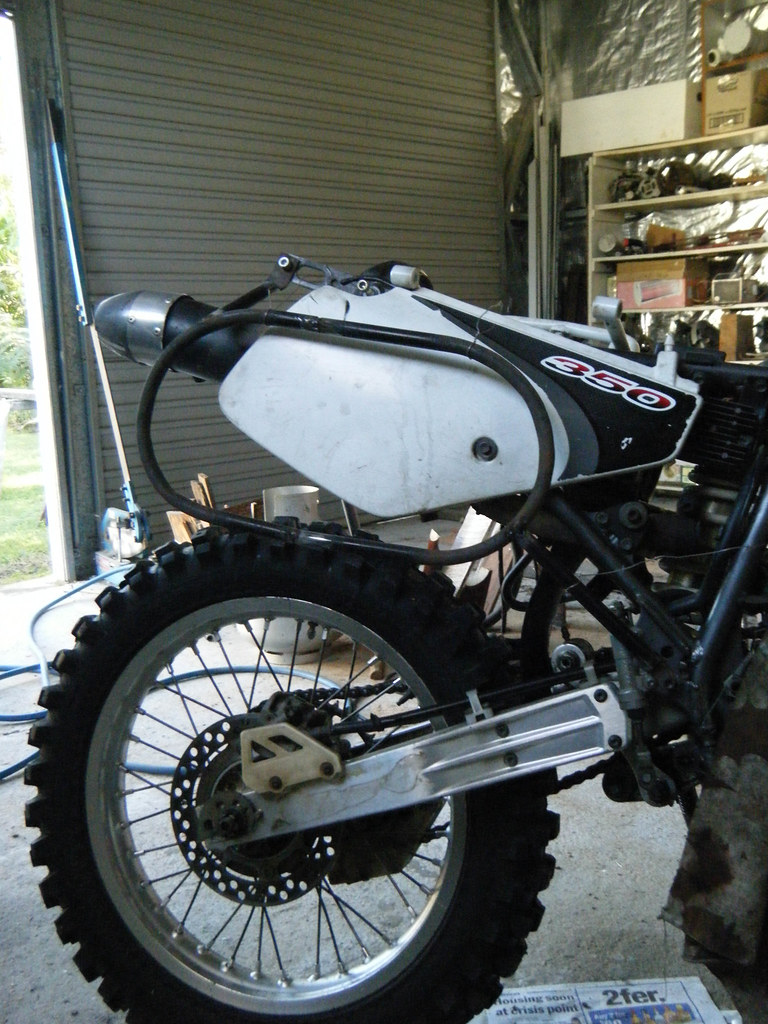
DR 350 is almost complete. I rode it down the street as is.
It makes it easier for me to touch the ground!


The purpose of this test is to ensure that the bike runs well and had not faults with in the engine. I decide not to wear a helmet, so I can listen to its heartbeat a lot clearer. I tap the front breaks and rear breaks and discover, that they are completely useless. I might as well put my foot out to stop the bike, which is when the bike stalls again.

Starting it up again, I try to rack my brains as to why it’s stalling all the time. Generally, when a bike will not go, it has something to do with a couple of simple points, petrol, spark, and air. If you remember these things, it will make your life a lot easier when trying to diagnose a problem. For this particular problem, my first clue was the fact I have to pull the choke out. The second clue was that it was a nice even distance between stalling. Therefore, on my way back to the garage, I had some idea it had to do with petrol flow.

Arriving back at the front of the workshop, I left the bike idling as I tested the horn and then turned it off using the kill switch. They both worked perfectly. At least something works right.

Early Sunday morning, I get down to the business of changing my break fluid on the front and rear breaks. You have to remember, that break fluid is highly toxic stuff and will eat through paint and plastic. It’s highly recommendable that you use a couple of old rags to protect the areas on your motorcycle. I clean the reservoir of dirt and surround it with a rag. I also do the same on the break calliper. Pumping the fluid through the hose, I remove the worn yellow coloured fluid and replace it with bright green fluid.


My makeshift break fluid bleader.


When it came time to do the front wheel, I attached the hose to the nipple and released the nut. When I squeezed the leaver, I found the fluid didn’t flow through the hose but came out sideways from the nut. Instantly tightening the nut, I took a closer look at the nipple. It was packed full of mud, reaching for a narrow nail it broke the dried mud up into tiny clumps and replaced the hose.

On the second time around, it worked, as it should have done. Topping up the top reservoir as the yellow fluid flowed out with the clumps of mud into the tin can. Placing the main container down on my makeshift workbench, I hear a strange noise and look over to it seeing, bottle on its side and green break fluid pouring all over the concrete floor. I must have placed the bottle down on the crack between the two boards causing it to tip over. Now I had to go into massive clean up mode before it eats a layer of concrete off the floor!

With nothing else to do, I decided to take my bike for another test run, placing the tank back on the bike, and turning on the petrol, it took a few seconds to flow down the pipe, filling up the carburettor and then spill out onto the bike. Immediately shutting off the fuel, I knew that this might have something to do with yesterday’s fuel problem. Removing the carburettor from the bike, I unscrew the screws and look at the floats. Measuring the distance between the base of the carburettor and the floats, I discover that it’s just boarder line past its limits.


Removing the floats, I bend the metal tab downwards and reinstall the floats. Putting the whole unit back together, I could then check to see if it is still flooding by hooking it up to the tank. No petrol spilled out, so I had done the trick. Time to install it back on the bike.

Putting the whole bike back together, I take it for the final test run of the weekend. A group of tiny girls, run to their front fence and watch me race past, clapping and screaming with excitement. I wasn’t a good role model as I still had no helmet! Taping the breaks, I find my front ones now work but my rear are still soggy.


This is the first time Ive seen it all together in months!
(Im putting on a larger tank - its not shown due to me, trying to keep it clean!)


Back in the workshop, I look at my front rim. It’s slightly bent, but I had planed on swapping it with my other DR rim. Balancing the bike on the timber box, I remove the front wheel from both bikes. Lining up the new rim, I slide the axel through, but it hits a piece of metal, and does not slide further. Pushing a little bit harder, I start rocking the bike on top of the wooden box. Realizing how dangerous this whole exercise is, I remove the wheel from between the forks. On a closer inspection, the older DR has a smaller axel diameter.

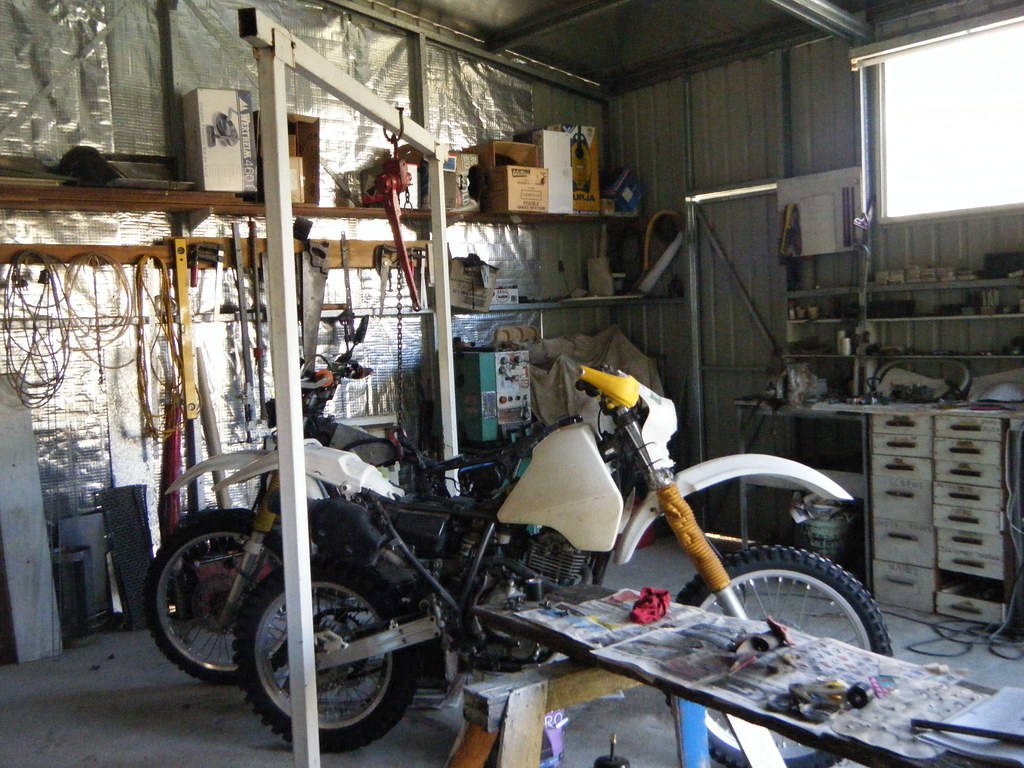
Replacing the older rim back on its bike, I remove the bike from the gantry. I put the new bikes wheel back on, wheel it over to the gantry, and host it up. I now can remove the front wheel without been frighten of the whole thing tipping over and it can safely hang there until next weekend. As I am now going to have too send it off to see a professional doctor.


July 28, 2010

Brimmm Brimmm sounds like music to my ears.


Leaping into position, I push down lightly on the kick-starter. Hearing the sweet sound of the piston pushing through the cylinder and the air forced out the exhaust, just made me want to push down harder on the second kick.

Following through on the next one, I heard the same sound, but nothing happened. Again and again nothing… On the fifth stroke, I thought this is stupid. Dismounting I take a look at the spark plug connections. Sure enough, I had forgotten to connect the tiny wires that join the spark plug with the CPU. Not a good start to the day!

Placing the petrol tank back on the bike and connecting the hoses up once again. I returned to my position. Again, pushing down on the kick-starter, the engine failed to come to life.

Starting to get frustrated, I check all the connections once again. When I looked at the ignition and discovered I had forgotten to put the key in and turn the bike on! I return moments later from the house with the key in my hot little hand. I inserted it and placed in the ‘on’ position. There was no need to worry about flatting the battery, as the motorcycle didn’t have one. 


Everything looked good. The only think that wasn’t connected was the kill switch. I removed the spark plug lead and installed the one off my older DR. Again, nothing happened.

I remove the lead and re-installed the original one. Retiring to the computer, I hope that I will be able to find an answer in someone else’s posts. That’s when a friend notices I’m on line and gives me a call. Reading from his workshop manual, He tells me that I need to check the ignition and the kill switch is connected properly.  

Knowing I haven’t connected the kill switch, I gave it ago. Connecting the two wires leading out of the kill switch to, two of the four available. I try push down on the kick, while watching for a spark to appear at the end of the spark plug.

Again, nothing happens…

With nothing else to try, I grab a can of WD-40, spayed all the electrical connections, and inside the spark plug lead. I even got my smallest screwdriver and scrapped the insides out of the lead.

Finally, on my last desperate kick I saw a tiny yellow spark. I swapped plugs and there it was a beautiful bright blue spark. Screwing the plug back into position, I gave the kick-starter a good hearty kick. The three months of silence ended as the bike finally roared to life.

July 20, 2010

Closing up the engine and other bits and pieces


Before heading out to the workshop, I had to stop in at 'Tyres for Bikes' as apparently my oil pump drive gear, which i broke many moons ago, has arrived! Now I can put my engine back together after a long wait. After a social morning there catching up with the guys and another motorcycle travel friend I hadn’t seen since last year, I hit the workshop once again.

It had been six weeks since I first ordered the part and a couple of weeks before that when I started stripping down the bike. So I was feeling a little worried I wouldn’t remember where everything is and how to put all the pieces of the 3d jigsaw puzzle back together. Slowly piece by piece it fell into place, thanks for my careful labelling and storing of the parts.

Taking a brain break, I grabbed my rusty muffler. I gave it a good brush, removing any loose rusty spots and hard wedged in dirt with the wire brush. Once it was completely clean, I take it out side and spray it with high temperature resistant paint. Coating it evenly, I leave it outside to dry. 

While waiting for one side to dry, I thought I would clean something else, grabbing the degreaser off the shelf. I spray it all over the item. Bouncing off the piece, the degreaser lands on the freshly painted muffler and destroys my good handy work.


Now that my engine is completely closed up, I still cannot attempt to start it as the engine still sits naked within the bikes frame. Installing the carburettor, muffler, air box and all the cables, I now had a complete bike. Now all I have to do is attach all the extra pieces.

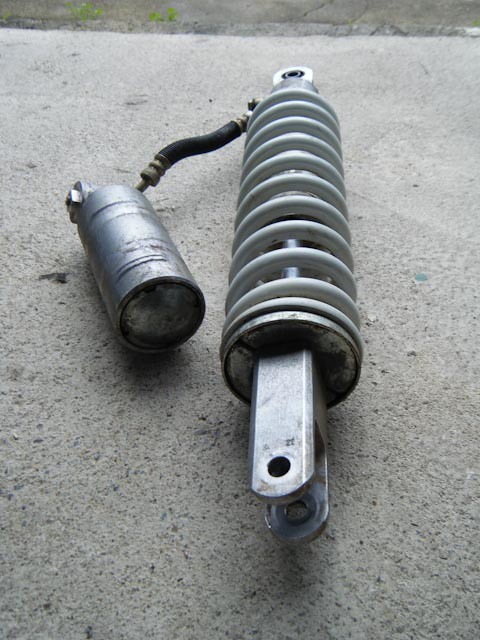
I had sent off my rear suspension to ‘Vince Strang Motorcycles’ to be reconditioned a couple of weeks ago. In order to put this bike on the road, I needed to borrow one of my other DR. Pushing it into the garage I hook it up to the gantry next to my other bike and began to remove the rear end.


Once I had the suspension in my hands, I then proceeded to install it onto the other bike. With the rear suspension and swing arm installed. I was able to roll it off the old nail create and bring it out to more of a useable and safer workspace.


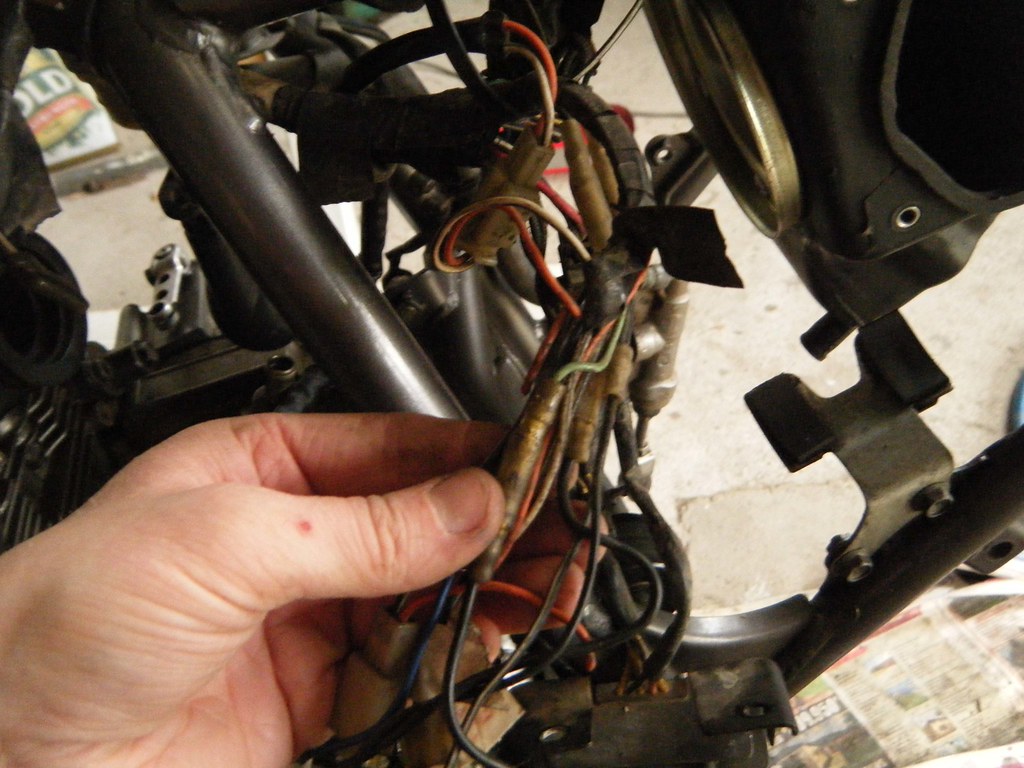
Stripping back all the old electrical tape, I rewrap all the wires in fresh clean tape. As I try to tidy up the wires as I go, I find myself pulling more and more apart creating more of a mess then actually tiding it up. Eventually I come to the end and I can go back and put all the wires back into their zip ties and flatten it all back down.


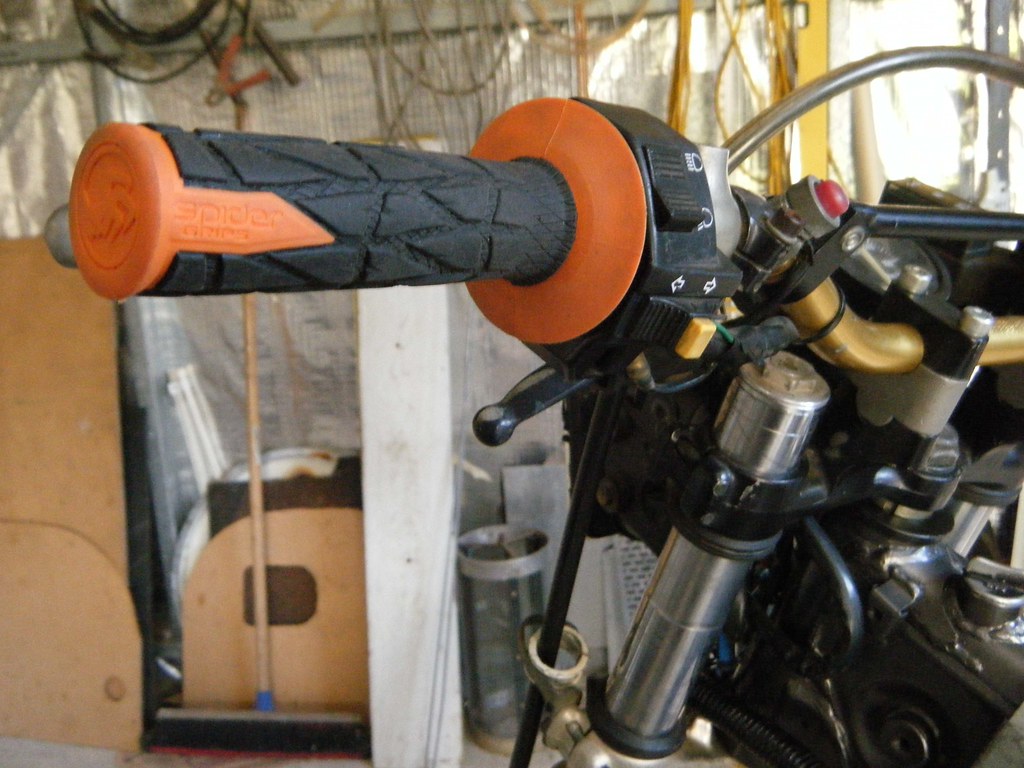
The pieces fell to the ground as I cutting the tired old grips off my handlebars. Cleaning the surface from years of built up glue and dust. I then had the hard decision on what colour to start out on! Pulling from the pile a hot pair of orange ‘Spider Grips’, I then begin the battle of the handlebar verus my hands! I’ve never had to do this myself before, so I was quite surprised to find my hands stinging after a few minutes of squeezing the ‘Spider Grips’ onto the handle bars. Eventually one was on, but my hands we useless to do it again. So I took a break and an hour later I returned for the next one. For some strange reason this one went on a lot easier! 


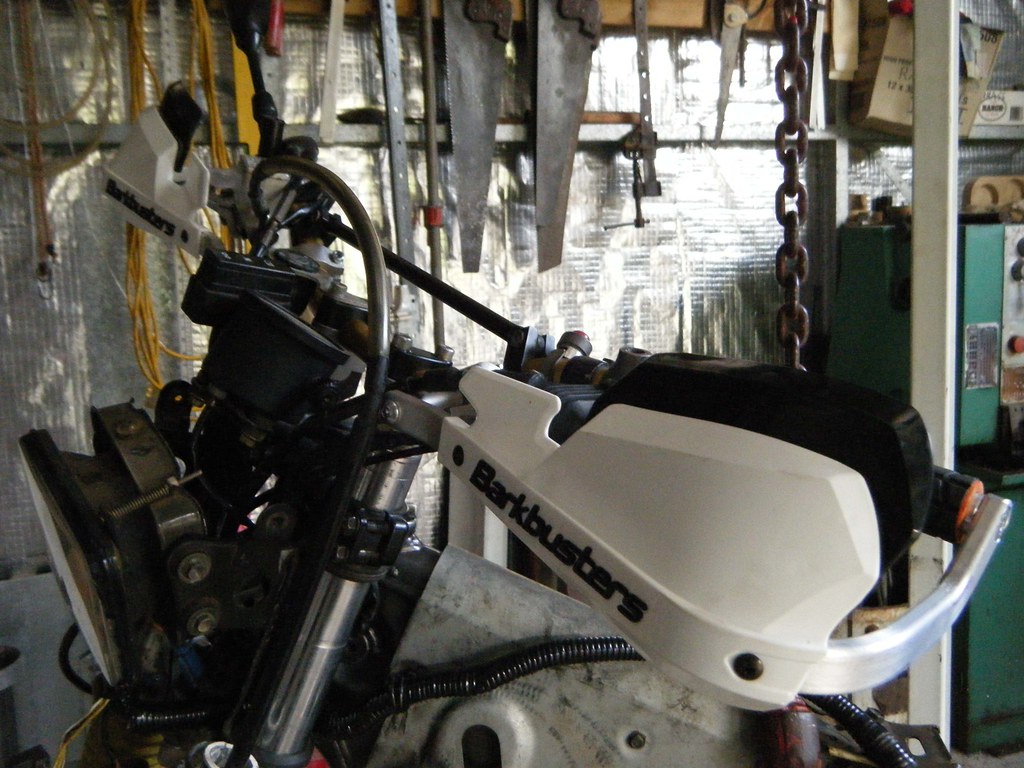
Cutting of the ends of the ‘Spider Grips’ off I slip one end of the ‘Barkbuster’ into the hollow of the handlebars to hold it into position while I tighten the socket head cap screws to the brackets into place. After I adjust them to the perfect height I go back and tighten all the screws.

My handle bars are now looking and feeling pretty amazing, like a bike that’s about to see some action.


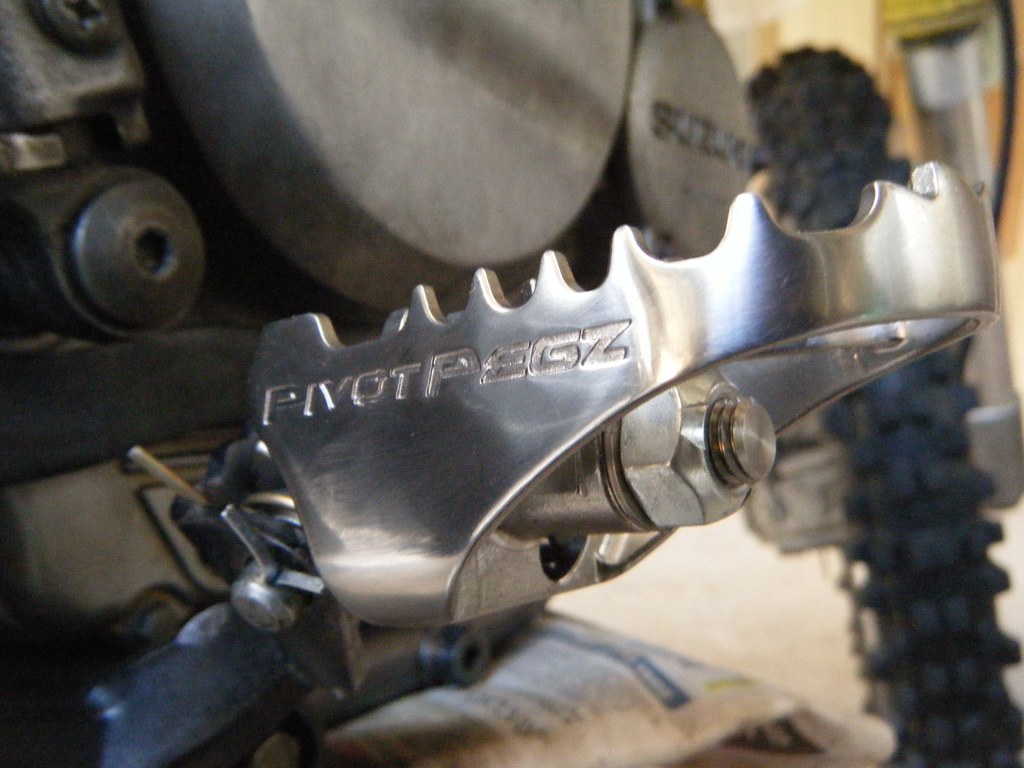
Removing the old rusty pegs from their mounts, I try to work out how to install the ‘Pivot Pegz’. By doing it all on the workbench, I had made it all that bit harder for my self. I know the pegs and mounts have a direction. Trying to match the sides up deemed painful. When I thought I had it all worked out, I went to install them on my bike, to find I had buggered up in my thoughts and had to swap them over!

Next time, I think I’ll change them over on the bike!


July 13, 2010

Bearings Bearings and More Bearings....

After a couple of weekends off from working on my motorcycle, I am feeling a bit anxious. I need to get back into that workshop and get my hands dirty once again. Its quite hard to turn down exciting things that are happening every weekend, such as the dreaming festival, roller durby and free tickets to music gigs. But if i want to head off in October, I have to spend every minute of each weekend in that workshop!

This is also my first weekend in the workshop without my uncle Len. No more guidance, no more chatting about how i can do things differently. But without him there, I can set things up slightly different. I lined two saw horses in a row and placed two old heavy timber planks ontop, creating a second workbench. On the other workbench, I lay out all the tools i will be needing for the next few weeks. This will save me some time not having to hunting for the correct tool.


Ive never enjoyed replacing my wheel bearings, I always struggle to find the lip for the drift to rest upon. The step by step instructions in the manual never mention how to shift the spacer over enough to be able to tap the bearing out. Hence, why I wasnt really looking forward to this job, but it has to be done, so I better  get stuck into it. I had another motorcycle traveller on my couch and he said replaceing wheel bearings are the most satifiying task - i am yet to feel like that!


Removing the front wheel from the axel and placing it onto my new work bench, I hunt through the stacks of metal bits to find a suitable drift and insert it into the center of the wheel. I find a small lip of the bearing to tap agaist. Eventully the spacer has enough room to breath and shifts over allowing me to be able pry it loose from the wheel hub. Flipping the wheel over I tap the second bearing out on the other side. Repeating this process for the three bearings in the rear wheel, I now have five bearings which have no grease and are going slightly rusty.


With my wheel bearings out of the way, I thought I better check the swing arm bearings before I head down to the bearing shop. Setting the bike ontop of a empty nail box and ensuring that the frame is well hooked up to the gantary. I remove the all the bolts that hold the swing arm inplace. Pulling it free from the bike, with the rear suspension attached. I let it rest on the ground, I glance back at my now extremly naked bike.


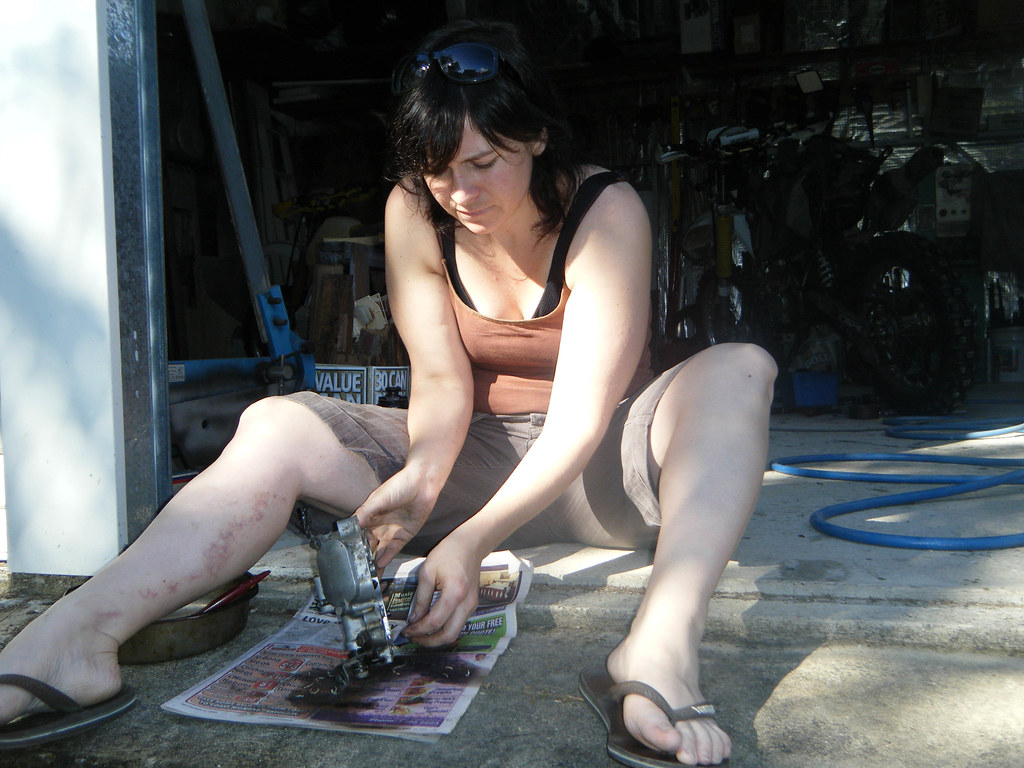
Using a shallow dish of petrol and a paint brush, I clean out all the old well used grease from each bearing. Moving on to the lower linkage, as the grease disolves into the petrol all the needle bearings fell out. Luckly for me, I had a nice clean piece of old newspaper for them to land on. I filled the housing full of grease and stuck each needle back in, hoping they wont fall out again.  


During the week, I head down to see the old guys at 'Premier Bearings'. I was warmly greated by two really lovely guys, once of which sat behind a desk piled high with books and bits of loose papers. It was quite refreshing to not see a single computer in sight! While Trevor, when to get my bearing from the store room, I told them all about my plans for my next adventure and what i got up to during my last adventure. They bosted to me they had a computer ordered and should be arriving shortly. So I wrote down my website address and told them to keep an eye on me. I had to returning to the shop later in the week to pick up my ordered bearing seals, when I did, I said to them 'I have something for you' and hands Trevor, a couple of motomonkey stickers ' its so you wont loose my website address'. 'We got someone computer savy to look up your website' Trevor replied proudly.


For each bearing, I poped out the seal on one side and fulled the bearing full of grease replaceing the bearing as soon as I had done and marked that side with a black pen. Repeating this excersise for all five bearings I was going to install that day and the other five Im going to carry with me as spares. The reason I do this, is to ensure that no water can posibly enter into the bearing and destroy the bearing. I then fill the 'v' in the bearing seals full of grease too.

With the rear swing arm and wheel off the bike, when I removed the front wheel to install the new bearings. The bike suddenly dropped down and the whole bike lifted off the nail box. Panicing, I drop the wheel ready to grab the bike as the forks stop short of hitting the ground by two inches. I am so glad, I chained the bike up to the gantary! After I finished panicing, I placed the wheel onto the bench, balanced the bearing flat over the whole and then placed a large socket over that. I then could hit the socket without damaging the bearing. This doesnt go as smoothly as Ive written, I had to pull the bearing out several time just to start again, as I wouldnt hit square on with the socket, which in turn would make the bearing wedge into the hug at an odd angle... I eventually hammer them home and press my new bearing seals into place.

Re-stalling the front wheel, just to stop the bike from swinging around on the gantry. As for my rear wheel, Ill have to install that another day, when my swing arm is back on!

June 8, 2010

The Pannier Frame Design


Last adventures pannier frame

Ever since coming back from my last adventure, I have been contemplating why my frame didn’t fail but my pannier bags did. Most people complained about how they had to weld their rack up several times over the course of their journey. However, I had absolutely no trouble at all with my rack. It held up against all odds, several big crashes, people pulling and lifting the bike from it and of course the day to day extreme use over a variety of unpredictable terrains. 

I have to remember, when I first set out on my last adventure. I only had just learnt how to ride a motorcycle and got my motorcycle licence. Over a course of six months, I learnt how to maintain my motorcycle, and design and build my pannier racks and toolbox. Therefore, right from the start I knew I would probably be able to develop my design at the later date.

Completely happy that the rack did not fail, I knew the construction and design was good. The fact that it caused stain on my pannier bags at a particular area was an issue. I asked several people for their comments on the bags, no one had any complains about my issue. I then sat down and drew a diagram trying to work out the loading on the bags. It was then suddenly clear, that my old panniers had been tappers outwards to clear the muffler and toolbox. I also had made them too narrow and too short. Which means it didn’t support the entire width of the bag. 


The top image shows the area of strain. The lower image shows the way the bags hang and want to pull down towards the rear wheel.


I started sketching out my ideas trying to develop on my existing design and incorporate extra storage for tools and spare parts. If I can remove that particular, weight and bulk out of my pannier bags. I would hope that it will lessen the wear on the bags.


Rear and front pannier and tool box design, based on my old rack design.


Study looking into where I could put the extra storage.


One of my major dislikes to my old tool box location was that, every time I got a flat tire, I had to laid my bike on it side to fix it. If I didn’t remember to remove my tire changing tools before hand I would struggle to get them out. I needed to find a more convenient place to store them. I started thinking about storing them on my front fender. Which means that no matter how I put my bike down I will be able to access my most used tools. 


Front toolbox for storing tyre changing gear and a spare tube.


While I was trying to work out the best pannier system, I had to think about the best material to make it out off. I could use the same 12 mm steel square hollow section. Even though this section had a small curve on the corners, I still I wrapped it in rags and electrical tapped to stop any wear on the panniers it self. Once a month I found myself tidying up the ragged ends, trying to make my bike look more presentable. Even thought this was relatively low maintenance schedule I still didn’t want to have that chore again.


Len and I spied two tatty old fold up chairs, where the material had faded badly, and border lining tearing apart the next time someone sat down on it. Removing the fabric, we get the testing of the steel underway. To test the metal, we go through several very scientific tests. We begin by squashing one end in the vice, followed by a welding test then we heat it up with our gar torch and bend it. After these tests, we conclude that the metal would be perfect for my pannier frame.


First design of rear pannier frame using the existing rear rack as a connection point.


Starting from starch, I looked at changing my design all together. Using the existing rear rack, I thought I would add to it. Taking a rectangle and then connecting the rectangle up to the bike, in the most appropriate places. To make sure the rack didn’t collapse when hit on the corner, I added corner braces. This was my first design, which used less material and could support my panniers. 


Design Two – By making each corner curved for strength which means I can remove the angle brace


I then thought about how I could loose some more weight out of my rack. By curving each end, I found I could remove the angle brace since the curves will take place of that. The only issue now was how I curve the metal. After much discussion, my uncle finally agreed with my theory of heating it with our gas torch.  


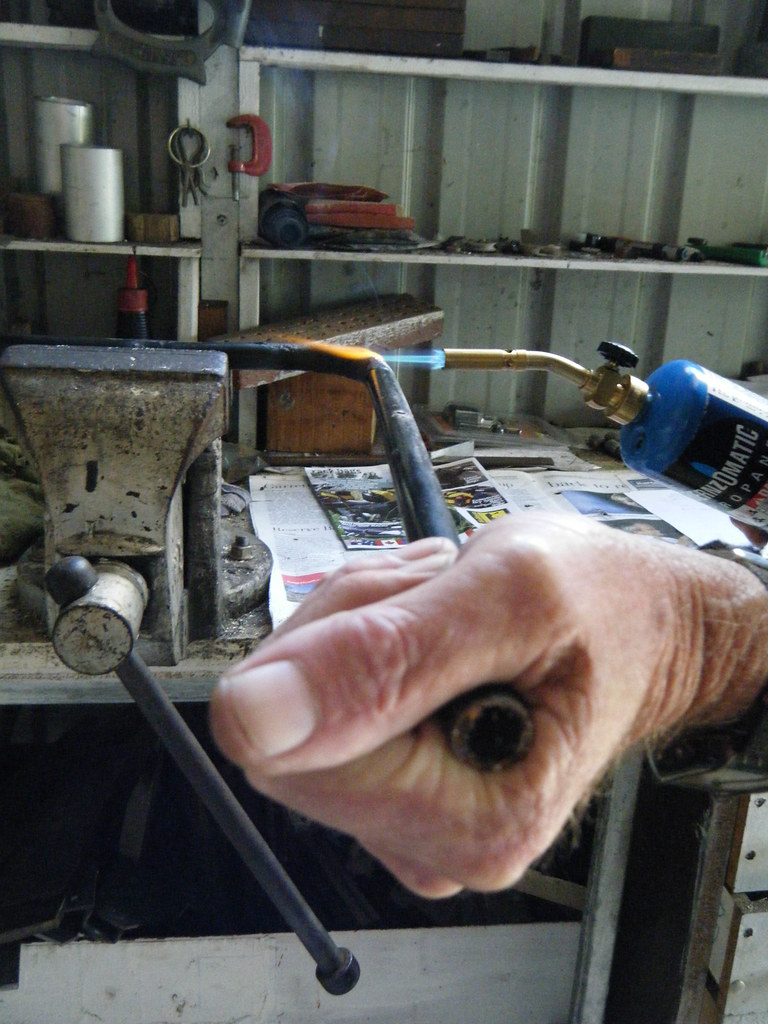
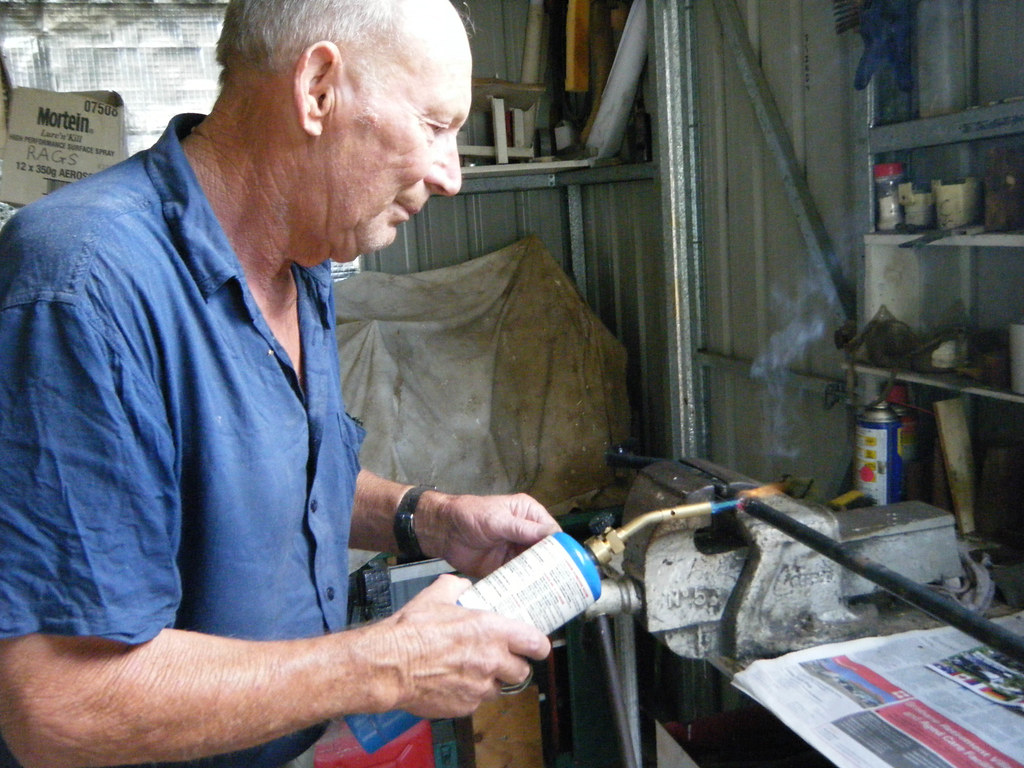
Using a thick builders pencil to drawing out the design, at a one to one scale on piece of used particleboard. We now had a template of the major part of the pannier. We will use this to hold the bent pipe to and compare the curve. Locking one end of the pipe into the vice, we heat the metal one inch a time bending consistently until we got a half circle. Repeating this action four times, we now had all the bits to make each side.

After allowing the pieces to cool, I place them into ‘best fit’ pairs and laid them on the template. From there I decided where to cut them to length. I mark them and lock one into the vice. Picking up the grinder, I use it to put it down to length. Once I had cut all four pieces, we insert a joining rod inside the tube and my uncle Len spot-welds them together.


Using our trusty sky hooks (a piece of bent wire hooked over my bike seat), I positioned it against the bike. Measuring from the ‘O’ shape to the sub frame connection points, we cut and file down the ends to ensure the best possible fit to the ‘O’ and the motorcycle. Len also welded these onto the ‘O’ shape and we fitted it into position using sock head cap screws.


Before I can work on the other side I have to first work out how I was going to do my rear tool/spare parts box. I had made an aluminium box several months earlier, but I personally wasn’t completely sold on the idea. As most of you would know, aluminium is a very soft metal, which when rubbed often it can wear through. It has also been known to crack. To find someone who is skilled to weld aluminium is generally very difficult. I would like to explore other options before I can carry on with the rest of my pannier rack. 


Open Heart Surgery on the DR 350


Looking at my newly acquired DR350, I feel a bit worried. After the oil incident, I think I might have made a mistake and should have kept on hunting for a bit longer. Shelving those feelings for a bit, I settle down to the relaxing task of removing the plastics, stripping it down to the main structure, and exposing its engine. Then sitting down on an empty wooden nail box, my eyes bore holes in the engine as time fell away. I had not moved but in my head, I have formed a rough plan of attack.


With a week to fine-tune my plan, I was back kneeling next to my motorcycle. Below me, I line my tools up with high hope of sustaining tidiness. Piece by piece I strip the engine down. Removing each piece with total care, while paying attention to every detail. I slid each bolt into its corresponding hole on a piece of cardboard mapped out to match the true location of the engine. Removing in the only order possible, working from the top down, I removed the head cover, the head, piston cylinder and the piston head and any everything else attached or in the way of the deconstruction.


Starting on the lower end of the engine, I remove the clutch cover to expose the clutch and lower cam chain sprocket. Giving my self a small treat, I pull out the impact driver, removing all the tiny bolts to release the clutch basket in no time at all. With one quick glance, I could see that the pervious owner told the truth and had replaced the clutch and basket recently.


Putting it aside I reach for the large socket and the half-inch drive placing it on the cam chain nut, I start to turn it counter clockwise. Failing to turn anything but all the cogs, I jam a screwdriver into between the oil pump drive gear and the cam chain sprockets. With one heave on the drive, I see the spanner fly out and skid across the workshop floor. Laughing I pick it up and replace it back in between the teeth, I try again. Again, it flies out with an odd pining sound. Frowning I look at the oil pump sprocket to discover I had broken one of the teeth off. Annoyed at myself for breaking the sprocket unnecessarily, I pulled out the impact driver out again. Within seconds, the nut was off the shaft and I was able to remove the cogs and sprockets.


On sunday, I laid every useable part out on the workbench. With the workshop manual turned to the correct tables, I settle down to accurately measure the wear on the parts using my uncle’s trusty callipers. I found that each piece was just past the worn specification stated in the book, which isn’t good enough for a long journey like mine.


With all the fairings in one corner, engine bits in another and no new parts were expected to arrive for a few weeks, I have to go on with other things. Len shows me how to remove my valves using a home made 'G' clamp which was built for my last DR engine re-build. We squeeze the valve springs down to release the collars from their locked position, allow me to remove the valve steam. With my workshop manual open to right page, I measure everything using callipers. All the measurements were coming up well within the specification. 


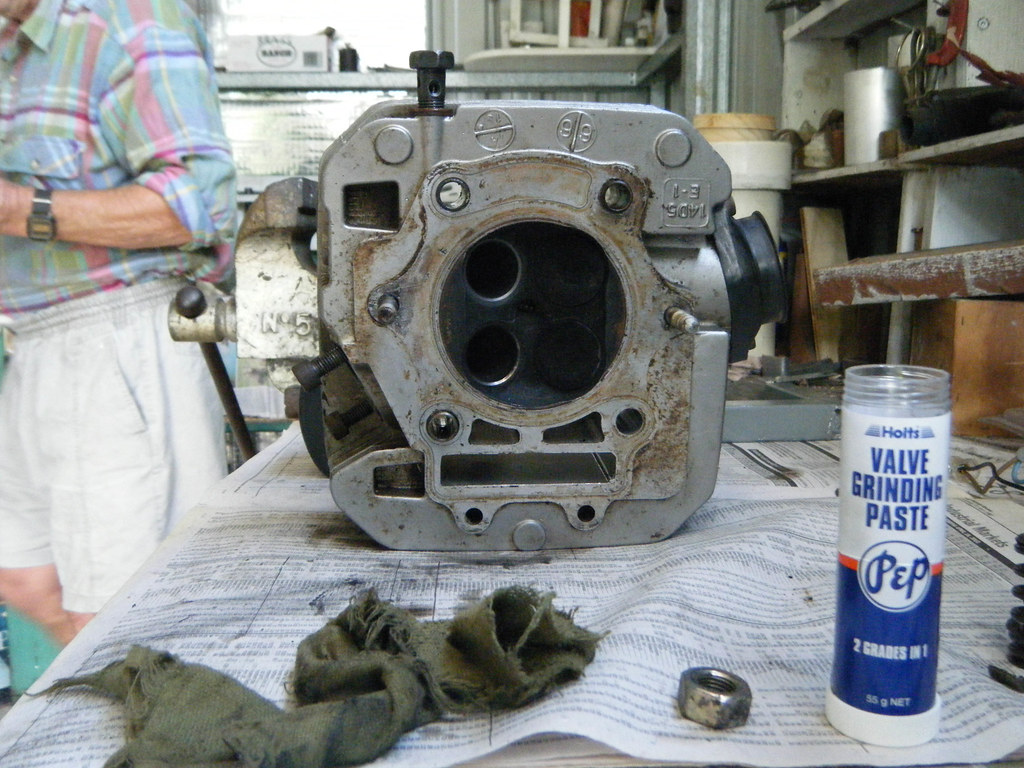
Len spots tiny pitting around the valve head, which becomes more evident once we put it into the lathe and give it a good clean. After a quick trip to the auto shop, I now have cutting compound, which we lightly put on the valve head and reinstall into the shaft. Using a cordless drill, we turn the head backward and forwards letting the cutting compound grind a new flat surface. After a close inspection and a wipe down with a clean cloth. The valve head and seat come up like new. Now its time to re-install.


Setting the 'G' clamp into the vice, we balance the head in the clamp and wind down the top. Making sure the shaft slides through the two springs. Once we see the groove that the collars are mean to sit into we stop winding. With a collar in one hand and a small screwdriver in the other, I proceed to push it down into the tiny gap. Hoping it does not fall down too far or the process has to be repeated once again. This happen about four or five times before we finally got it to work and quickly wound the spring back out into the locked position. We repeated this for all four valves.


Moving down, I check the piston head and rings. The head has the usual carbon stuck to the top of the head but this time, it is malleable, therefore quite easy to clean off. Again using the callipers, I measure the piton head diameter, the piston ring grooves and compare the clearances permissible. I discovered that the top piston ring had lost its spring and had a larger gap then what is tolerable. Taking the bore, into the sunlight to inspect the possible wear, or not wear in this case. It even had the original cross-hatching of the factory honing. This meant I only had to give it a quick light swipe with a hone to ensure it was round and had no major pits. Setting up the hone in the power drill, we swipe the bottom of the cylinder just to check we are on the right path. Seeing that we were not taking too much off, we carry on completing the tidy up of the entire bore. I then clean out the bore using several paper towels until the towel showed no dirt.


Time is running out, I only have Len helping me for the next three weeks. I can only work on my motorcycle during the weekend so that leaves me only three weekends! I needed to write a list of all the items I required to do on my motorcycle and highlight exactly which tasks I really need his help. I head back to the city with my list of parts to buy, hoping I could get them for the following weekend. I ring my favourite motorcycle shop ‘Tyres for Bikes’. Calling then I discover that I now had to wait two to three weeks for some for some of the stuff to be sent from Japan! I swear they are strapping the individual parts on snails and sending them on their merry way overland to Australia. Little adventurous wee suckers – didn’t they know that the Vietnamese love snails!